תיאור
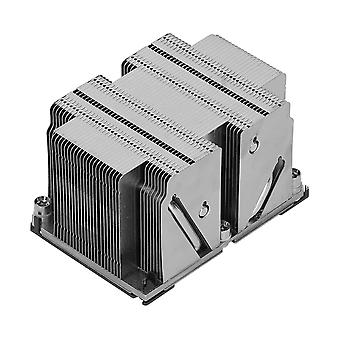
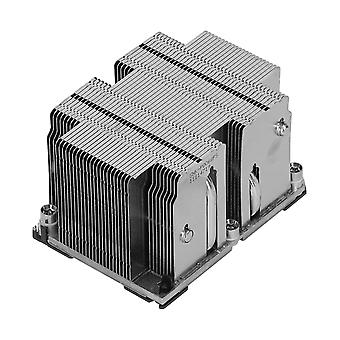
12U passive CPU cooler, using LGA3647-0 narrow mounting mechanism, easy to install. 2The CPU cooler is designed for general-purpose 2U and higher servers equipped for Intel Scalable processors. 3The heat sink has been thoroughly tested and verified to ensure the best quality and cooling performance. 4Small size, easy to carry and store, convenient to use and with good performance. 5Great workman, perfect replacement for the old one and has a long service life.
Item Type: CPU Heat Sink
Model: SNK-P0068PS
Motherboard: X11 Purley platform CPU cooler
Socket Type: LGA 3647-0 (narrow ILM)
Application: X11 Purley Platform 2U and above series servers
Server Size: 2U
Cooling Method: Passive
CPU Configuration: Single processor, dual processor, multi processor
Supported CPU: For Intel Xeon Scalable Processor
Supported CPU TDP: Up to 205W
How to Use:1. Snap the bracket directly into the processor by aligning the triangle marks between the bottom of the processor. If the processor has fabric, use a sharping tool to move the non-fabric processor support frame to the bracket, and then immerse the filtered bracket in the fiber processor;
2. Face the bottom of the heat sink and remove the thermal grease to protect the ID. The required thermal grease has been pre-applied on the bottom of the new heat sink. Make sure that there is no contamination on the thermal grease.
Note: The cooperation between the bracket and the backing plate controls the direction of the heat sink installed on the motherboard. First check the required heat sink orientation on the motherboard, and then insert the processor tray subassembly into the heat sink in the required orientation.
3. Place the hollow triangle mark on the bracket toward the chamfer of a corner of the heat sink base. Then, align the two diagonally aligned partial posts on the bracket with the corresponding two guide holes on the heat sink base. At the same time, the other two diagonal latches on the bracket should be connected to the corresponding edges on the base of the heat sink.
4. Ensure that the enlarged part of the post and lock on the heat sink are in the pre-engagement position of the core of the heat sink base. Install the components before the processor on the heat sink. All alignment guide posts and latches on the positioner must lightly engage the heat sink base. Make sure there is no contamination on the processor
5. Remove the dust cover of the cpu socket. The carrier faces the triangular marks printed on the PCB and the pad. Then put the PHM on the pad. The two guide posts on the backing plate must pass through the two Post alignment holes on the heat sink base
6. Tighten the PHM on the backing plate according to the assembly sequence 1> 2-> 3-> 4 printed on the assembly and disassembly label. Each screw should be screwed all the way down and fully tightened in one operation. In order to achieve a fully tightened state, each screw should not be tightened several times. The screwdriver must be equipped with a T30bit and set the torsion to 13.8kgf-cm (12 lbf-in).
Note: If the required assembly sequence is not followed, the heat sink mounting screws, washers or collars will be damaged.
Note: The purpose of the numbers and arrows printed on the assembly and disassembly labels is to install the heat sink screws. Disassembly sequence only.
-
מזהה Fruugo:
204446578-434628115
-
EAN:
889615190784
משלוחים והחזרות
שילוח תוך 2 ימים
משלוח מ- סין.
אנו עושים כמיטב יכולתנו להבטיח שהמוצרים שאתם מזמינים יישלחו אליכם במלואם ובהתאם למפרט שלכם. עם זאת, אם תקבלו הזמנה חלקית, או פריטים שונים מאלו שהזמנתם, או שיש סיבה אחרת לכך שאינכם מרוצים מההזמנה, באפשרותכם להחזיר את ההזמנה, או כל אחד מהמוצרים הכלולים בהזמנה, ולקבל החזר מלא עבור הפריטים. הצג מדיניות ההחזרים המלאה