תיאור
Specifications
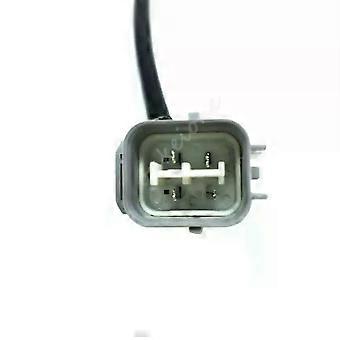
Electronic:No
High-concerned chemical:None
Type:Heating Type
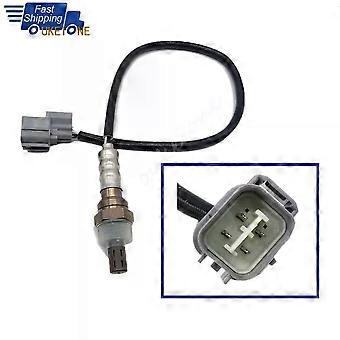
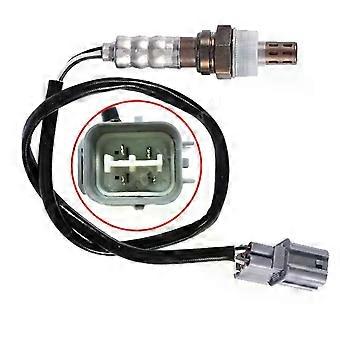
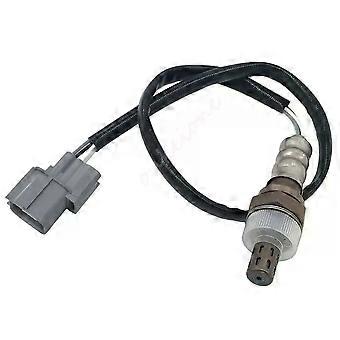
Repeatability:4 Wires
Hysteresis:Upstream, Sensor 1, Front, Pre Cat.
Linear:For 1992 1993 Acura Integra 1.8L Upstream
Measuring Range:For 2005 2006 2007 Honda Accord 3.0L
Sensitivity:For 2008 2009 2010 Honda Odyssey 3.5L
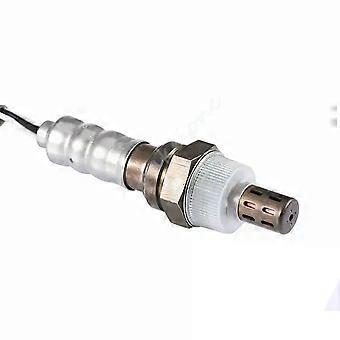
Sensor Type:Piezoelectric
Origin:Mainland China
OEM NO.:234-4099 234-4355
Replaces OEM Part Number:
234-4099 234-4355
Fit for:
1997 1996 Upstream
1998-1999 Acura CL 2.3L Upstream
1997-1999 Acura CL 3.0L Upstream
1992-1993 Acura Integra 1.7L Upstream
1992-2001 Acura Integra 1.8L Upstream
2004-2006 Acura MDX 3.5L Downstream
1995-1999 Acura NSX 3.0L Downstream
1997-1999 Acura NSX 3.2L Downstream
2004-2006 Acura TL 3.2L Downstream
1992-1994 Acura Vigor 2.5L Upstream
1990-1997 Honda Accord 2.2L Upstream
1995 Honda Accord 2.7L Upstream
2003-2007 Honda Accord 3.0L Downstream
1998-2002 Honda Accord 3.0L Upstream
1992-1995 Honda Civic 1.5L Upstream
1998-2000 Honda Civic 1.6L Downstream
1992-2000 Honda Civic 1.6L Upstream
1993-1995 Honda Civic del Sol 1.5L Upstream
1993-1997 Honda Civic del Sol 1.6L Upstream
1997-2001 Honda CR-V 2.0L Upstream
1995-1997 Honda Odyssey 2.2L Upstream
1998 Honda Odyssey 2.3L Upstream
2005-2010 Honda Odyssey 3.5L Downstream
1999-2004 Honda Odyssey 3.5L Upstream
2006-2008 Honda Pilot 3.5L Downstream
1990-1991 Honda Prelude 2.1L Upstream
1993-1996 Honda Prelude 2.2L Upstream
1992-1996 Honda Prelude 2.3L Upstream
2006-2008 Honda Ridgeline 3.5L Downstream
1996-1997 Isuzu Oasis 2.2L Upstream
1998-1999 Isuzu Oasis 2.3L Upstream
Package included:
1 * Oxygen Sensor
Note:
1. Please check OEM number before purchasing.
2. Please allow 1-3cm error due to manual measurement. Thanks for your understanding.
3. Monitors are not calibrated same, item color displayed in photos may be showing slightly different from the real object. Please take the real one as standard.
Must Know Before Buying:
A: The only way to know if the O2 sensor is functioning normally is to check its responsiveness to
changes in the air/fuel mixture, by Voltage Measurement or Waveform Simulation.
Use a 10-megaohm digital voltmeter. Hook up the voltmeter's red probe to the sensor's signal wire
and the black probe to engine ground. (Use back probe method, DO NOT pierce the wire.) For a good sensor, voltage should fluctuate constantly between 0.1 and 0.9 volts after starting the engine for 2 or 3 minutes.
Please take a video clip of the voltmeter and contact us if our sensor:
Goes above range between 0.1 and 0.9 volt
Remains below 0.5 volts
Stays fixed at a particular voltage
You're free to choose replacement or refund if our sensor fails to work, in this case.
Position confirmation:
Upstream sensor is before the catalytic(cat.) converter.
Downstream sensor is after the catalytic converter.
Upstream oxygen sensor is also known as sensor 1, or pre-cat, or upper oxygen sensor.
Downstream oxygen sensor is also known as sensor 2, or post-cat, or lower oxygen sensor.
When should we replace the oxygen sensor :
How to replace the oxygen sensor :
Step 1 - Some sensors are equipped with a heat shield that must be removed before the sensor removal, this is performed by removing any mounting bolts.
Step 2 - By using a regular socket it minimizes potential damage to the sensor body and the threads, this technique helps avoid stripping the old sensor upon removal.
Step 3 - Then, locate and disconnect the wiring connector, this step should be done before removing the sensor if the wiring is still attached.
Step 4 - Its important that the wiring harness connectors are exactly the same, each sensor is unique to it's position and is located in the system by its connector configuration. (Note: some replacement sensors have a universal electrical connector that must be configured to the wiring of the old sensor.)
Step 5 - Use a small wire brush to help clean the threaded port to ensure a proper seal of the new sensor. Gently install the new oxygen sensor by hand while keeping the wiring and connector free from bends.
Step 6 - Gently tighten the sensor while keeping wiring free from damage, these sensors need to be fairly snug to avoid leakage.
Step 7 - Once the sensor is tightened, reinstall any heat shields or bracing that had to be removed.
Step 8 - After the heat shield has been reinstalled, mount the connector to it's holder and reattach the connector back onto the wiring harness. If the car has diagnostic trouble codes, they will need to be cleared.
1.Our Working Time:(GMT+8)Monday to Saturday,8:00-18:00.
2.For inquires and customer support, please send your email to us.All emails will be responded to within 24 hours during business days.
3.Parts Inf
-
מזהה Fruugo:
436630301-915143427
-
EAN:
325181263472
מידע על בטיחות המוצר
אנא עיין במידע בטיחות המוצר הספציפי למוצר זה המתואר להלן
המידע הבא מסופק על ידי קמעונאי צד שלישי עצמאי המוכר מוצר זה.
תוויות בטיחות למוצר

מספר חלק של היצרן:
325181263472
מספר דגם:
325181263472
מספר סידורי:
325181263472
מספר אצווה:
325181263472
משלוחים והחזרות
שילוח תוך 3 ימים
משלוח מ- סין.
אנו עושים כמיטב יכולתנו להבטיח שהמוצרים שאתם מזמינים יישלחו אליכם במלואם ובהתאם למפרט שלכם. עם זאת, אם תקבלו הזמנה חלקית, או פריטים שונים מאלו שהזמנתם, או שיש סיבה אחרת לכך שאינכם מרוצים מההזמנה, באפשרותכם להחזיר את ההזמנה, או כל אחד מהמוצרים הכלולים בהזמנה, ולקבל החזר מלא עבור הפריטים. הצג מדיניות ההחזרים המלאה