תיאור
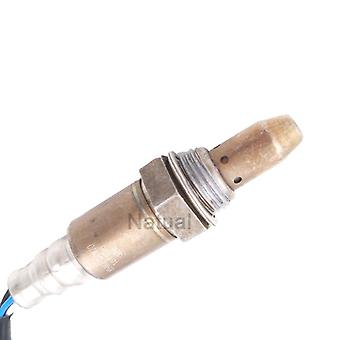
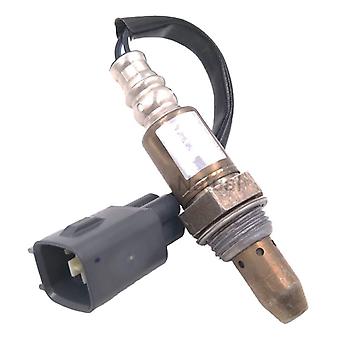
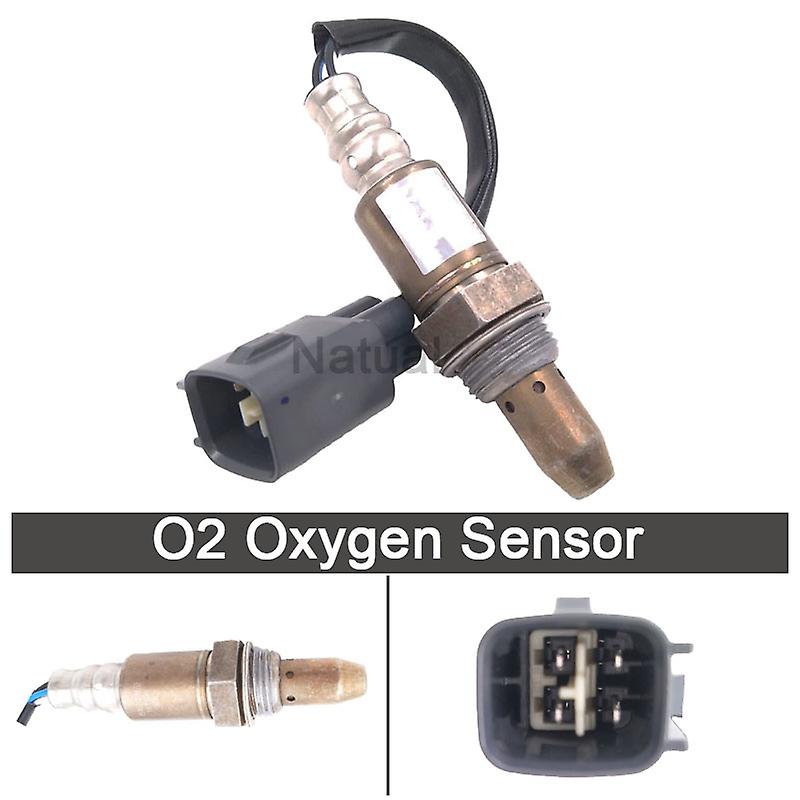
Port Material: Copper andPlastic
Condition: In-stock, Brand-new, 100% test before send out
Application:
For Daihatsu Charade VIII 2011/05-2021/12 -- 1.33 16V 1329 ccm, 73 KW, 99 PS
For Lexus IS II 2005/10-2013/03 ALE2, GSE2, USE2 250 2499 ccm, 153 KW, 208 PS
For Lexus IS C 250 2009- (GSE2_) (GSE20) 4GR-FSE Convertible 2499cc,153kw,6Cyl
For Lexus GS 450h 2006-2011 (_S19_) (GRS191_, GWS191_) 2GR-FSE Saloon 3456cc,218kw,6Cyl
For Lexus GS 460 2007-2011 (_S19_) (UZS190_, URS190_) 1UR-FSE Saloon 4608cc,255kw,8Cyl
For Lexus GX 460 2010-2013 (URJ15_) 4WD 1UR-FE Closed Off-Road Vehicle 4608cc,218kw,8Cyl
For Lexus LS 460 2006- (_F4_) (USF40) 1UR-FSE Saloon 4608cc,280kw,8Cyl
For Lexus LS 600h 2007- (_F4_) (UVF45) 2UR-FSE Saloon 4969cc,290kw,8Cyl
For Toyota Auris 2010/01-2012/09 ADE15, NDE15, NRE15, ZRE15, ZZE15 1.33 Dual VVT-i 1329 ccm, 73 KW, 99 PS
For Toyota Auris 2009/05-2012/09 E15 1.33 Dual VVT-i 1329 ccm, 74 KW, 101 PS
For Toyota Corolla Stufenheck 2008/12-2014/07 E15 1.33 1329 ccm, 74 KW, 101 PS
For Toyota Urban Cruiser 2009/01-2016/03 P1 1.33 1329 ccm, 73 KW, 99 PS
For Toyota Urban Cruiser 2009/04-2016/03 P1 1.33 1329 ccm, 74 KW, 101 PS
For Toyota Yaris 2010/07-2011/05 KSP9, NCP9, NSP9, SCP9, ZSP9 1.33 VVT-i 1329 ccm, 73 KW, 99 PS
For Toyota Yaris 2008/11-2011/12 KSP9, NCP9, NSP9, SCP9, ZSP9 1.33 VVT-i 1329 ccm, 74 KW, 100 PS
For Toyota IQ 2009- (_J1_) 1.0 (KGJ10_) 1KR-FE Hatchback 998cc,50kw,4Cyl
For Toyota Land Cruiser Prado 2003-2009 (_J12_) 4.0 (GRJ125_, GRJ120_) 1GR-FE Closed Off-Road Vehicle 3956cc,183kw,6Cyl
For Toyota Prado 2002-2007 (_J1_) 4.7 (UZJ100) 2UZ-FE Closed Off-Road Vehicle 4664cc,175kw,8Cyl
For Toyota Vitz 2010/07-2011/05 (_P9_) 1.33 VVT-i (NSP90_) 1329cc
For Toyota Vitz 2008/11-2011/12 (_P9_) 1.33 VVT-i (NSP90_) 1329cc
For Toyota Blade 2009/05-2012/09 (_E15_) 1.33 Dual-VVTi (NRE150_) 1329cc
For Toyota Blade 2010/01-2012/09 (_E15_) 1.33 Dual-VVTi (NRE150_) 1329cc
For Toyota Altis 2008/12-2014/07 Saloon (_E14_, _E15_) 1.33 (NRE150) 1329cc
For Toyota Altis 2008/12-2014/07 Saloon (_E15_) 1.33 (NRE150) 1329cc
For Toyota IST 2009/04-2016/03 (_P1_) 1.33 (NSP110_) 1329cc
Oxygen Sensor's Location:Oxygen Sensor's Location:
How do I know the O2 sensor is good or not?
Check engine light on
A reduction in fuel economy.
Your catalytic converter fails unexpectedly
Exhaust emiions reach undesirable levels.
How to install the oxygen sensor?
Step 1 - Some sensors are equipped with a heat shield that must be removed before the sensor removal, this is performed by removing any mounting bolts.
Step 2 - By using a regular socket it minimizes potential damage to the sensor body and the threads, this technique helps avoid stripping the old sensor upon removal.
Step 3 - Then, locate and disconnect the wiring connector, this step should be done before removing the sensor if the wiring is still attached.
Step 4 - Its important that the wiring harne connectors are exactly the same, each sensor is unique to it's position and is located in the system by its connector configuration. (Note: some replacement sensors have a universal electrical connector that must be configured to the wiring of the old sensor.)
Step 5 - Use a small wire brush to help clean the threaded port to ensure a proper seal of the new sensor. Gently install the new oxygen sensor by hand while keeping the wiring and connector free from bends.
Step 6 - Gently tighten the sensor while keeping wiring free from damage, these sensors need to be fairly snug to avoid leakage.
Step 7 - Once the sensor is tightened, reinstall any heat shields or bracing that had to be removed.
Step 8 - After the heat shield has been reinstalled, mount the connector to it's holder and reattach the connector back onto the wiring harne. If the car has diagnostic trouble codes, they will need to be cleared.
-
מזהה Fruugo:
170966224-365566226
-
EAN:
9056007184855